Sunday, 28 February 2016

How to Root Samsung Galaxy Note N7000 free

Rooting any mobile version had not been so easier as today. As the Technology has been grown up you can now Root Samsung Galaxy Note N7000 in just a few minutes. Rooting will give you lots of customization options and unlocks many features. It allows you to install more apps. The process is relatively simple, but you may need to downgrade your device to an older Gingerbread version if you are running a more recent one.

Things to do before Rooting

Before we begin to start rooting the Samsung Galaxy Note N7000, let me just tell you the things that you should care about.
Make sure, that which Firmware your device is currently running on. Here is the list of firmware versions that can be rooted directly:
  1. XXKJ1
  2. ZSKJ6
  3. XXKJA
  4. XXKJ
  5. JPKJ4
  6. XXKK3
  7. XXKKA
  8. JPKK2
  9. XBKK4
  10. DXKK1
  11. ZSKK1
  12. DXKK1
  13. XXKK9
  14. XXKKA
  15. DXKL3
  16. DXKL1.
If you find that you are running on one of these listed above, kindly proceed to the rooting process. Otherwise, you will have to downgrade your Samsung Galaxy Note to an older ROM.
Check out, How to downgrade Galaxy Note to KJ1 Firmware. When you start downgrading your device, you must take a look on your personal data, make sure you have backups of your personal data.
Backup your Galaxy Note
To backup your contacts, you should sync them with your Gmail account. For your personal SMS messages backup use this way → SMS Backup and Restore. And for your call logs backup go with this → Call Log Backup and Restore. You can copy your files to the either internal or external SD card, so that they won’t get deleted during the update.
Samsung Galaxy Note N7000
Root Samsung Galaxy Note N7000
At first place, you will first have to check which Kernel is your Galaxy Note using. If you have already downgraded it earlier, then it should be KJ1. Otherwise, download the proper file from the following list:  KJ1, KJ4,  KJ6/KJ7/KJ8, KK1/KK2/KK3/KK4/KK5, KKA, KK9, KL3, KL1.
How to check Kernel version in Android
How to check kernel version in your mobile device. Go to Settings → About phone → Kernel version. You can see that a name like this one 2.6.35.7-N7000XXKJ4-CL641703. In the name the kernel version is KJ4 in the middle of the name.
Extract the file, make sure you have USB debugging mode enabled and the latest Samsung USB drivers should be installed on your PC. If you don’t, please try installing the last version of Samsung Kies. Now, simply connect your Galaxy Note with PC, run not-rooted-yet.bat and press any key to start the rooting process. In a few minutes you should have a rooted Galaxy Note. Now your Galaxy Note N7000 should be rooted and you will have to upgrade it to either a newer Android Gingerbread or Android Ice Cream Sandwich ROM.

Updating Android Jelly Bean 4.2.2 in Samsung Galaxy Note N7000 free

At first place, let me tell you about the previous Android version of Galaxy Note N7000. It was 2.3.5 Gingerbread and later it features Android 4.1.2 Jelly Bean. The owners of Galaxy Note N7000 were trying to find out the best ways to update their devices with Android 4.2.2 Jelly Bean that gives them more advance features such as colour inversion, lock screen shortcuts, notification drawer and custom Quick Settings. Using Slim Bean ROM, you can update your Samsung Galaxy Note N7000 Jelly Bean 4.2.2 containing all features of the Android OS, customisation and amazing themes, tweaking capabilities, constant update, stability, and relatively bloat-ware free system.
Warning: Slim Bean ROM is a customised ROM and its developers are not liable for any damages on your device. The featured ROM only applies to Samsung Galaxy Note N7000 and should never be installed to any other devices.
Samsung Galaxy-Note-N7000
Still you can prevent damages by following the instruction below carefully.
Requirements:
Before updating your Android version, make sure that your device meet all the following prerequisites:
  • Your device must be rooted to be able to flash the custom ROM. Click one of the OS version for rooting instructions: Gingerbread 2.3.5 or Jelly Bean 4.1.2
  • Create a backup of all your personal information, settings and data files on your device. Do not use Samsung Kies since Slim Bean ROM is a custom ROM which won’t be detected by the program
  • Please disable antivirus apps from your handset as well as from your computer temporarily. Maybe they will interfere in the middle of installation progress
  • The battery should be charged at least 70% to prevent any power interruption during the installation
  • Enable USB debugging mode on your device.
  • Install a custom recovery app such as ClockWorkMod recovery or TWRP
  • Install USB drivers on your computer for the Galaxy Note N7000
  • Download the Slim Bean Build 6 Android 4.2.2 ROM and the Slim Google Apps package on your computer
Flashing Instructions
  1. Connect your Samsung Galaxy Note N7000 to your PC via USB cable
  2. Just copy the Slim Bean custom ROM and the Slim Google Apps package in the external memory of your device. Don’t extract them…
  3. Now, disconnect the device from the PC and reboot your device into recovery mode using the custom recovery app
  4. In Recovery mode, select backup and restore > backup, this will create a backup of the current ROM which you can restore any time
  5. After the backing your Android up, select wipe data/factory reset and the wipe cache partition to clear/delete all of your device data
  6. Install .zip from SD card > choose zip from SD card and choose the Slim Bean ROM zip file to install it. Do the same with the Slim Google Apps zip file
  7. Once the installation has been completed, reboot system now. Boot up may take 5 minutes for its first run.
Congratulations! Now, your Samsung Galaxy Note N7000 is running on the latest version of Android 4.2.2 Jelly Bean…

Saturday, 27 February 2016

Top 10 Features in Android 4.3 Jelly Bean free

Google has announced the most recent version of its Android operating system as Android version Jelly Bean 4.3, with its new Nexus 7 tablet. The new version will also called Jelly Bean this is the third version that carry the same tag after Android 4.1 and Android 4.2. This version update comes from Google after nine months before Android 4.2. The new Android OS is being rolled out first in Google’s own Nexus range of devices including the original Nexus 4, Nexus 7 Tab, Nexus 10 Tablet.
Let’s take a look on Android 4.3 Jelly Bean Features.
10 Android 4

1. Smart Bluetooth Ready

Now, in Android 4.3 Jelly Bean Google seems to be making wearable technology by introducing the Bluetooth Smart Ready feature. Devices running Android 4.3 will now be able to support low-energy Bluetooth Smart accessories like heart rate monitors, pedometers, thermometers and many others. Users can now sync the low energy devices without these affecting the battery usage of the device.

2. Bluetooth AVRCP

By now, Google devices will be running on Android 4.3 Jelly Bean that can easily be sync with Bluetooth enabled car stereos and offer additional functionality. This Bluetooth AVRCP 1.3 version will allow stereos to display metadata effectively this includes the song names when music is being streamed from on Android 4.3 device.

3. Restricted profiles

Google has added multi-user profiles in the last iteration of Android and it seems the search engines giant wants to enhance that experience through restricted profiles.

4. Notification Access

A popular feature on Android yet with Android 4.3 the Notification bar has been added. You can control and interact with the status bar notifications.

5. Dial-pad Autocomplete

Android 4.3 Jelly Bean adds the auto-complete feature in the dial-pad suggesting contact names/phone numbers when a user start typing something.

6. OpenGL ES 3.0

You will be excited with OpenGL ES3.0 if you are a game junkie. This feature would let Android devices render high quality graphics in games and other apps.

7. Simplified Setup Wizard

Android Jelly Bean now supports corrections to user inputs while signing-in to the device, the first time. This is due to more streamlined user agreements.

8. Location accuracy features via Wi-Fi scan only mode

Google has now increased the location accuracy of Android devices by allowing location scanning via Wi-Fi.

9. Keyboard & input

Android 4.3 comes with an upgraded algorithm for tap-typing recognition that makes text input easier while chatting via messages or even while composing emails.

10. Hindi support lands on Android 4.3

Google has introduced native local language support to its operating system for Amharic, Africaans, Swahili, Hindi, and Zulu. Hindi has finally reached the stock Android operating platform.

Top 20 PHP URL Shortening Scripts free

In today’s article, I’m going to show you the Top 20 PHP URL Shortening Scripts. All these scripts are useful PHP url shortener scripts, custom URL shortener scripts and URL short scripts. Using these scripts you can shorten any URL and make unique URLs. Out there are also online URL shortening services available lik e Bit.lyGoo.gl, etc. Let me JUST tell you that these PHP URL shortening scripts will let’s you create your own custom designed URLs for your domains so users can recognize your site instantly.

Why Using These PHP Shortening URL Scripts

Using these PHP shortening URL scripts you can benefit from some of their features i.e, user management system that will give your users to login, register, recover and change password, edit profiles, shorten URLs, QR code generators, social media share buttons, custom database and file backup and much more.

1. PHP URL Shortener

URL Shortener let’s you create short URLs for your websites, so that your websites users will be able to recognize your site instantly. If you wish, you can also give users the access to register, create and share their own short URLs and monitor how many visits each link has had.
PHP URL Shortener

2. Url Shortener by diax10

URL Shortener is a powerful and clean script which offers users the chance to use short urls very easily.

3. PHP Script for URL Shortener

This is advanced URL Shortener, which allows you to create your shorts URLs, for example domain.name/a3vd.
Url Shortener

4. Curly URL Shortener

If you want your site to be listed here then send us an e-mail with a link to your website.
Curly URL Shortener

5. Premium URL Shortener

Premium URL Shortener is packed with tons of awesome and unique features that other scripts don’t have.

6. Url shortener and expander

This class can shorten or expand url’s with multiple url shortener services.

7. Advanced PHP URL Shortener

Advanced PHP URL Shortener is a powerful clean & lightweight script that allows your visitors to shorten their urls, track the hits, and even more.
Advanced PHP URL Shortener

8. URL Shortener Script with Statistics

URL Shortener Script with Statistics is a powerful URL Shortener based on Google’s Shortener, it offers advanced link statistics from Google, such as referrals, browsers or operating system used by the visitors.
URL Shortener Script with Statistics

9. URL Shortener Script with Stats page!

Awesome URL Shortener application which comes packed with simplicity and features.
URL Shortener Script with Stats page!

10. Protect-My-Links & Shortener

Protect My Links is a Link protection service that assists you in protecting hundreds of links a in ONE SINGLE link.

11. No-mouse URL Shortener with API and Bookmarklet

This URL Shortener’s purpose is to giver the user a unique user experience when shortening URLs.
No-mouse URL Shortener with API and Bookmarklet

12. Simple Clipboarder with URL Shortener Service

This script allows you to offer/have an online clipboard to share texts and URLs between different devices – URL Shortener Sevice included.

13. URL Uncover – uncover any short url

URL Uncover is great tool to find out the real link hiding behind a short url.
URL Uncover - uncover any short url

14. SM Short URL Script with Admin panel

Its a template based php/mysql powered ready to go url shortener script with amazing features like jquery page transition effects, api support for developers.
SM Short URL Script with Admin panel

15. Advaced Facebook Viral Application

To get traffic you need the visitors get subscribed to you. Offer them a free download with content locking, to unlock the content they must connect with your Facebook app.

16. PHP Bit.ly Plugin

The bit.ly plugin interacts with the bit.ly api allowing you to easily shorten urls, decode short links (to determine where they point), and find out how many times a link has been clicked.

17. QR Codes Ultimate Generator

This application enables you generate QR Code images and URLs that you can print out or use in your own website or application.

18. QuickLinks

QuickLinks allows anyone to create QR Codes from their own server, and then re-direct them as many times as they like.

19. Goo.gl API Class

Goo.gl API Class is an easy to use PHP wrapper for google’s url shortening service, goo.gl.

20. BitDrop – File Hosting with Short URL Link

Using BitDrop you can shorten URL for your uploaded files in hosting to make them look pretty good and recognizable.
BitDrop - File Hosting with Short URL Link

How to Add Responsive Columns in WordPress via Shortcodes free

Adding columns to individual post or page in WordPress maybe needed while blogging with WordPress. So, I realize that this would be better if I write an article about adding responsive columns in WordPress. I’d published an article for Genesis Framework users before about How to Insert Columns in WordPress Blog Posts/Pages with Genesis Easy Columns? But, in today’s article let me just show you about adding responsive columns in WordPress via shortcodes.

Adding Responsive Columns in WordPress via Shortcodes

WEN’s Responsive Column Layout Shortcodes is WordPress plugin which easily adds responsive columns layout inside of your WordPress blog posts and pages just by wrapping content with a shortcode. To use and add responsive columns in your blog posts/pages you can simply use the plugin’s button in the editor to add columns.
WEN's Responsive Column Layout Shortcodes Screenshot
WEN’s Responsive Column Layout Shortcodes Screenshot
Or you can also add the following shortcodes in the post/page editor to display the columns according to your needs. The columns are responsive and will occupy the whole width of your screen.
  • 2 column layout: – [bscolumns class=”one_half”]Your Content Goes here[/bscolumns] [bscolumns class=”one_half_last”]Your Content Goes here[/bscolumns]
  • 3 column layout: – [bscolumns class=”one_third”]Your Content Goes here[/bscolumns] [bscolumns class=”one_third”]Your Content Goes here[/bscolumns] [bscolumns class=”one_third_last”]Your Content Goes here[/bscolumns]
  • 4 column layout: – [bscolumns class=”one_fourth”]Your Content Goes here[/bscolumns] [bscolumns class=”one_fourth”]Your Content Goes here[/bscolumns] [bscolumns class=”one_fourth”]Your Content Goes here[/bscolumns] [bscolumns class=”one_fourth_last”]Your Content Goes here[/bscolumns]
  • 5 column layout: – [bscolumns class=”one_fifth”]Your Content Goes here[/bscolumns] [bscolumns class=”one_fifth”]Your Content Goes here[/bscolumns] [bscolumns class=”one_fifth”]Your Content Goes here[/bscolumns] [bscolumns class=”one_fifth”]Your Content Goes here[/bscolumns] [bscolumns class=”one_fifth_last”]Your Content Goes here[/bscolumns]
  • 6 column layout: – [bscolumns class=”one_sixth”]Your Content Goes here[/bscolumns] [bscolumns class=”one_sixth”]Your Content Goes here[/bscolumns] [bscolumns class=”one_sixth”]Your Content Goes here[/bscolumns] [bscolumns class=”one_sixth”]Your Content Goes here[/bscolumns] [bscolumns class=”one_sixth”]Your Content Goes here[/bscolumns] [bscolumns class=”one_sixth_last”]Your Content Goes here[/bscolumns]
If you have any questions, leave a comment below…

How to Enable Banning, Un-Banning & Clearing IPs in CloudFlare free

CloudFlare Threat Management WordPress plugin enables you to easily manage all banning, unbanning, and clearing IP addresses across entire CloudFlare account. Threat Management has already integrated with most popular WordPress security plugins such as WordFence.

How to Use CloudFlare Threat Management

Follow the steps below:
  1. First of all, install the plugin CloudFlare Threat Management in your blog
  2. Go to Settings > CloudFlare Threat Management
  3. On the plugin settings page, enter the CloudFlare associated email address and API key.
  4. Now, save that information and start specifying the list of IP address to blacklist (ban), whitelist (never ban) and clear (remove from CloudFlare completely).
Take into account that whatever you do changes while using CloudFlare Threat Management will be populated across your entire CloudFlare account. This means that if you have 50 domains registered under your CloudFlare account, and you ban a single IP address, that address is banned across all 50 domains. This is extremely helpful if you know the IP addresses are malicious and that you never want them to access your websites.

Top 25 Free Android Chat Apps free

In today’s article, let me just show you the most popular and top Android Chat Apps to use in your Android smartphones. As the chatting has become a tradition now and an easier way to get in touch with Family, Friends, and other people out there. In the following list I’ve also listed the most popular Android chat apps like NimBuzz, Skout, Facebook Messenger and more…

1. Chat Dating Meet Find Friends

The Chat Dating Meet Find Friends Android application has made this easy to find new friends and people nearby. And Waplog is the fast growing social network which has crossed millions of members from every country. So, the millions of people choice could not be incorrect. JUST download the official android application and join this great community.

2. Skout – Meet, Chat, Friend

Skout is the global network for meeting new people. This will connect with your instantly people nearby you or across the entire world. Using this app, you can discover new friends at a local bar or in Barcelona.

3. Go!Chat for Facebook

Using Go!Chat for Facebook Android app will allow you to see instantly who’s online on Facebook. You can easily change interface appearance with 5 built-in different themes. Share photos, videos and voice notes through Facebook chat.
Go!Chat for Facebook Android

4. LOVOO Flirt, Chat, Single App

LOVOO Flirt, Chat, Single App Android app will connect you with new people. This app will allow you to chat and find dates & singles matches & have fun. Let’s just get this love app radar and make party.

5. T-Mobile Video Chat by Qik

T-Mobile Video Chat by Qik Android application exclusively for T-Mobile Android devices. Using this app you can make video chats, video mail and video share for free.  Download the app today and start streaming live videos with friends and family around the world.

6. KakaoTalk: Free Calls & Text

KakaoTalk: FREE Calls & Text application has downloaded for more than 90 millions times world-wide. It’s the world’s best smartphone messenger that gives you the FREE calls and text service just within your Android phone. Make group calls in high-quality sound and schedule appointments in your chat room.

7. Moco – Chat & Meet New People

Moco – Chat & Meet New People Android application will allow you to chat, meet with new people, play games and more… No matter who or what you’re looking for, Moco is the #1 app to make new friends for chatting, flirting, dating, friendship or fun.

8. FunForMobile Ringtones & Chat

Make friends; Talk, Chat, Play; Download ringtone, wallpaper, and even made video by other members. Share photos, jokes, videos, and ringtones; Have fun at fun for mobile. Get this app.

9. Camfrog Video Chat Android App

Camfrog is a cross-platform worldwide video chat community with millions of active users in thousands of video chat rooms. Video chats with anyone in the Camfrog community whether they’re on an iPhone, iPod Touch, iPad, Android, Mac or PC.
Camfrog Video Chat Android

10. ChatON Android

Create a global social community with over 100 million friends who have ChatON through a Samsung account. ChatON supports 9 kinds of different platforms including Android, iOS, and web.

11. FriendCaster Chat

FriendCaster Chat is the latest and greatest Android chat app. That will allow us to keep up with our friends quickly and easily with our beautifully designed and easy to use interface. Eventually, you can also mark your “favorite” friends for even faster access.

12. Facebook Messenger

Text your friends for free. Get Facebook Messenger to instantly reach friends on their smartphones with Android OS. You can keep chatting, even while you’re using other apps. Send voice messages when you have more to say. For FREE.

13. Nimbuzz Messenger

Nimbuzz Messenger combines the power of internet and smartphone messenger into one, and lets you make cheap international voice calls, send unlimited chat messages, share files on any mobile device across popular messengers. The best thing that I love is that you can download this application for your Android at NO COST.

14. MessageMe Messenger & Chat

Staying connected in a meaningful way makes us happy, and let us share our thoughts, emotions and stories is what makes these connections rich and real. In a world where everything is moving too fast, MessageMe Messenger Android app offers you a cost-free way to connect and express yourself instantaneously and with as much creativity as you can handle.

15. SayHi! – Chat, Meet, Dating

SayHi can help you find new people nearby! You’re going to fall in love with. Using this app you can find out people nearby. By finding them with map, you can do video chat with them freely.

16. qeep – Free Chat & Messenger

Download qeep Android app to chat, meet people, and make new friends or even arrange your next date with. Click through profiles and photos, and chat with people from all over the world – or just next door.

17. Random chat for Korean

Random chat for Korean is a great way of meeting new friends. Using this app’, you can pick another user at random and let you have a one-on-one chat with each other. You can chat entirely anonymous if you desire to.

18. ICQ Free Calls & Messages

ICQ Free Calls & Messages app let’s you make FREE calls, text messages, photo and video sharing – one app with all the functions you need to keep in touch with friends.

19. GO SMS Pro FBChat plug-in

This is a free and convenient GO SMS Pro Facebook Chat plug-in especially for your Android smartphone. It can be integrated well with GO SMS Pro, making good use of the amazing facilities in GO SMS Pro, such as themes, chat/list style, searching, backup&restore, and etc.

20. GroupMe Android

GroupMe is the best way to chat with everyone you know. It’s free, whether you’re talking to a group of friends, or texting with one person. Best of all, it works on nearly every phone, with a smartphone app or via SMS.

21. Live Chat Android

22. Chatimity Chat Rooms

23. myChatDroid for Facebook Chat

24. chatroid (random chat)

25. Itzme Voice Chat

Awesome Social Icons with ClassySocial jQuery Plugin free

ClassySocial jQuery plugin will lets your site visitors easily see the social networks that you like to use. This plugin will add awesome social icons however, currently this supports Twitter, Facebook, Socl, Dribbble, Vimeo, Youtube, Pinterest, Google Plus, LinkedIn, Flickr, Instagram, Blogger, WordPress, DeviantArt, GitHub, Skype, Steam, Yahoo and e-mail. Let’s just allow your visitors to see your presence on 18 of the most popular networks instantly and interact with them. Just add these social icons on your websites with no web coding experience.
Have links to your Facebook, Twitter, GitHub, Vimeo, Dribbble, Instagram, YouTube (and more!) profiles shown in a slick way, sure to impress your users. Includes functionality to use your current Facebook image as the button that users press to draw out the network buttons, with automatic updating, pulled straight from Facebook!
Download ClassySocial jQuery Plugin
ClassySocial jQuery plugin

How to use ClassySocial?

At first place, to make this plugin work, we will need to load the jQuery script in the webpage to so, add the following code in the <head> section of your HTML webpage.
<script src="https://ajax.googleapis.com/ajax/libs/jquery/1.8.3/jquery.min.js"></script>
Since downloading the ClassySocial, you need to include the jQuery ClassySocial JavaScript and the CSS file, which you can do it by adding the code below to your page.
<script src="js/jquery.classysocial.js"></script> 
<link rel="stylesheet" href="css/jquery.classysocial.css" />
Finally, implement the structure on which you want to trigger the plugin.
<div class=”classysocial right” data-arc-length=”360″ data-image-type=”facebook” data-picture=”picozu” data-facebook-handle=”picozu” data-twitter-handle=”picozu_editor” data-email-handle=”office@picozu.net” data-networks=”facebook,twitter,email”></div>
You trigger the plugin on the element you just created. In this case, we trigger it on the element with the class classysocial.
$(“.classysocial”).each(function() {
    new ClassySocial(this);
});

Magic Unlock – Unlocks the Android When Hover Hand Over it free

Almost many people use locker app to lock their Android smartphones. This time, let me just show you a really nice Android app which let’s you unlock your Android phone on hovering your hand over the screen.

Magic Unlock Android

It’s been a  Magic Unlock Android app that lets you unlock your Android phone by hovering over it with your magic hands. Just imagine for a moment that you’ve got magic hands and when you move them to your smart phone, the phone unlocks automatically. How your Android phone unlocks by moving your left or right hand in the direction that your phone usually unlocks. You will navigate through your smart phone using your magic hands.
Useful tips
  1. Lockscreen security needs to be off
  2. Lockscreen needs to be active
  3. Works only after the screen is on
Magic Unlock Android Settings you should know

Wednesday, 24 February 2016

How to Order WordPress Blog Posts with Simple Custom Post Order free

This article will take you through about how to order WordPress blog posts with simple custom post order. I hope you will need this option someday. I don’t know when but maybe someday you want this option. Now, you an order posts (posts, any custom post types, any taxonomy) so easily with simple custom post order.
Simple Custom Post Order
By the way, this simple custom post order WordPress plugin will give you the options to order your blog posts using a drag and drop sortable JavaScript. Configuration is unnecessary. You can do directly on default WordPress administration. Excluding custom query which uses order or orderby parameters, in get_posts or query_posts and so on.
Here is the settings overview by this plugin:
Simple Custom Post Order settings

How to Add Responsive Facebook Like Box in WordPress free

As Facebook has become one of top social networking websites across the world. Facebook allows people to create fan pages for their brand, community, websites, etc. Over the past few years many people have created fan pages for their websites and added a Facebook like box in their websites that will allow their website visitors to join the website community on Facebook too. This gives the website visitors to directly get updates about your website on their Facebook news feed.
Anyways, we’ve already written some articles about Facebook like box i.e, How to  add Facebook like box in WordPressHow to promote Your Facebook Fan Page in a Pop-up window effectively, and now writing about how to add responsive Facebook like box in WordPress.

Adding a Responsive Facebook Like Box in WordPress

Facebook Like Box Responsive is a WordPress plugin which let’s you add a mobile friendly (Responsive) Facebook like box in a widget area within your WordPress blog. You can display responsive Facebook like box via a shortcode or by dragging and dropping a widget in the sidebars. The like box will simply take up as much space as you give it – perfect for variable width sidebars or any mobile/tablet website.
Responsive Facebook Like Box wp plugin
After installing the plugin, you will be able to display the responsive Facebook like box in your blog by simply dragging and dropping a widget named to “Responsive Facebook Like Box” in the sidebar where you want to display the like box. Configure the widget according to your needs by the way.
Responsive Facebook Like Box Widget Settings

What’s New in WordPress 3.6 Oscar free

Very recently, a new official release of WordPress CMS (Content Management System) finally available to all WordPress users known as WordPress 3.6 Oscar. Now, the WordPress users can upgrade their blog’s WordPress version from 3.5.2 to the new WordPress 3.6 Oscar. The latest WordPress version 3.6 named as “Oscar” is now live to the world. Which includes many new features such as new blog-centric theme, a bullet-proof auto-saving, post locking, a revamped revision browser, native support for audio and video embeds, and improved integrations with Spotify, Rdio, and SoundCloud.
WordPress 3
Here comes a video that shows off some of the best features using our cast of professional actors:

Top Features for WordPress Users

1. WordPress 3.6 Oscar brings you the most adorable good-looking new default theme called Twenty Thirteen which is unlike any other default themes before. Well, this Twenty Thirteen WordPress theme is a little bit bolder and colourful. It’s developed to showcase the power of post formats and all new features of WordPress 3.6 Oscar. This default theme is come up with responsive mobile friendly design, so that it can be accessible by mobile users.
WordPress Twenty Thirteen Theme
2. Revamped Revisions save every change and the new interface allows you to scroll easily through changes to see line-by-line who changed what and when.
3. Post Locking and Augmented Autosave will especially be a boon to sites where more than a single author is working on a post. Each author now has their own autosave stream, which stores things locally as well as on the server (so much harder to lose something) and there’s an interface for taking over editing of a post, as demonstrated beautifully by our bearded buddies in the video above.
4. WordPress 3.6 Oscar gives you a built-in HTML5 media player for native audio and video embeds with no reliance on external services.
5. The Menu Editor is now much easier to understand and use.

Top WordPress features for Developers

  1. A new audio/video API gives you access to metadata like ID3 tags.
  2. Ability to choose HTML5 markup for things like comment and search forms, and comment lists.
  3. Better filters for how revisions work, so you can store a different amount of history for different post types.
  4. Tons more listed on the Codex, and of course you can always browse the over 700 closed tickets.

How to Add a YouTube Subscribe Button in WordPress free

In this article, I’ve just shared a little guide about adding YouTube subscribe button in WordPress. Now, you can add a YouTube subscribe button in WordPress so easily without touching a couple of codes. It’s not necessary to add this subscribe button but what I’m gonna show you how you can do this within seconds.
YouTube Subscribe Button WordPress plugin let’s you add a YouTube subscribe button in your blog just by dragging and dropping a widget to your blog’s sidebars or footer wherever you wish to display that button. The button lets people subscribe to your YouTube channel without having to leave your site to either log in to YouTube or confirm their subscriptions.
YouTube Subscribe Button WordPress plugin
All you need to do is that simply install and activate the plugin in your blog. And go to Appearence > Widgets and drag-n-drop the widget called Youtube Subscribe Button in the sidebars or in footer. Input a suitable title to the widget like Subscribe with our YouTube Channel, input your YouTube channel id or name select the layout style and theme.

Youtube Subscribe Button Widget Settings

Alert: 50 Productivity Tips Published. Read this free

  1. Prioritize your day
  2. Make a to-do list
  3. Make a NOT to-do list
  4. Hang a ‘do NOT disturb’ board around your workplace
  5. Use Pomodoro technique
  6. Learn to say ‘no’
  7. Avoid checking emails as you first sit to use computer
  8. Have a good working environment
  9. Get rid of all clutter
  10. Be positive (yes, that helps!)
  11. Avoid using social networking sites until you’re done with the task you’ve been putting off (for that, use Cold Turkey)
  12. Do not check emails again and again. One time processing is good, but if it’s necessary you may go with twice, too
  13. Have a minimal desktop
  14. Use one tab at a time technique (TabZolo‘s here for rescue)
  15. Work while you work
  16. If put 100% of focus in work, you’re likely to get it done by 3x earlier (my estimate, don’t take it serious)
  17. Eat the big frog first. I mean, do the hardest or most important task first
  18. Exercise energizes. It’s good
  19. Have goals
  20. Have no goals
  21. Plan (with it, you don’t know the path to you desired destination)
  22. Stop thinking. Start doing
  23. Have an idea? Ask yourself, ‘what can I practically do about this idea?’
  24. Implement (genius is one percent inspiration, ninety-nine percent perspiration. — Mark Twain)
  25. Unsubscribe from useless emails (use unroll.me)
  26. Stop being a darn wuss
  27. Dream big
  28. Go into unknown space (going into the unknown is how you expand what is known. — Julien Smith)
  29. Work in small chunks
  30. Set deadlines
  31. Punish for missing deadlines
  32. Reward if you didn’t
  33. Hand your friend 10$, get slapped for getting into undesired tempting behavior
  34. Have a monitoring partner
  35. Maintain a sleeping time
  36. Maintain a waking-up time
  37. Sleep no more than 6.5h
  38. Go to bed early
  39. Get out of bed early
  40. Eat more protein
  41. Think big
  42. Focus on one thing at a time
  43. Track your time (use RescueTime)
  44. Get inspired
  45. Read more than ever
  46. Break limits
  47. Start now, not today, not tomorrow, or never
  48. Your time is limited, make it count
  49. Keep your reigns in control
  50. Be an optimist

Conclusion

These were all the productivity tips I could find. This is where, I ask urge you to tell me your tips (if any). Or, just do me a favor, forward this article link to someone. Just one. They’ll thank you later. And, if you don’t mind, consider sharing. Thanks!

GetResponse vs InstaPage: Comparison Who offers Best Landing Pages free

What is email marketing? Why do we need it?

The best example of “attract and catch” is that of fishermen. They stick a piece of meat on their fishing hooks and as soon as they throw it in the pond, fishes are bound to come closer to it after seeing the food. And as soon as the fish takes the hook in its mouth, that is when the fisherman pulls the line of his fishing pole and catches his target. Similar to this case, marketing is a means to capture consumers and pull them towards a company’s product or service. They provide discount rates, updates, catalogues, and coupons in order to keep the customers interested and make their company memorable to them. This helps companies to make brand loyalty among their customers. Thus, the customers make future transactions with the company in the future as well. However, within time the pond has expanded and it’s getting harder for fishermen to catch their fishes. They will need new tactics.

The use of Email Marketing is a fast growing trend since the past decade. Majority of the population rely on the internet for any sort of information and the increase in the global economy has led to people becoming more and busier in their daily lives. It is up to the salespeople to maintain their customer relationship in a way that prevents the client from become too reluctant to further find out about new services. Through email marketing, companies can electronically mail their catalogues and newsletters to a long list of potential contacts and keep the clients regularly updated on appealing offers.

GetResponse

GetResponse is used by almost all successful companies around the globe. The marketing tool has had a competitive edge since the beginning and has made remarkable efforts on making the survival of businesses much easier. With its state of the art features within reasonable price, it has managed to form alliance with several organizations. It has effectively helped companies to develop a long list of prospects, partners and clients and create a robust customer relationship. Getresponse has been able to satisfy more than 3.5 million users, and the number is still growing.

What are the features?

Autoresponders:

This is a key feature of Getresponse which lets users make flexible schedules for sending their newsletters with the click of a button. Most sales representatives are too busy to manually send their emails to their potential customers, however with the help of autoresponders, they can simply select the date and time at which the mails will be sent automatically.
Templates:
Getresponse lets you create, edit and resize your emails in the simplest way possible. It provides smart image editing, snipping archive and email creation history where you can easily undo any editing with no worries.

Webinars:
Users have the opportunity to register for webinars. They can either schedule for their own webinars or could participate in others. This expands the technical knowledge among marketers and through communication; they can exchange their own experiences and words of wisdom when it comes to maintaining a profitable customer base.

How much does this all cost?
Getresponse consists of 4 subscription packages:
  • Email (for $25 per month): provides autoresponders and basic landing pages.
  • Pro (for $49 per month): offers the additional feature of 100 webinars
  • Max (for $165 per month): users get a custom domain, account manager as well as 500 webinars
  • Enterprise (for $799 per month): 2 dedicated IP addresses, maximum mail out performance and deliverability consulting.

Instapage

Instapage is also a well-known marketing tool with astounding features to help companies achieve their target goal. Newsletters can be sent to target audiences within seconds to their computers, laptops, cell phones and tablets. More than 250,000 companies are relying on instapage. By simply filling out the three basic empty spaces (Name, Email and Password) we are ready to be a part of a fast growing landing page platform, and making the job of promotion easier for ourselves.
What are the features?
  • Instapage has launched several features for members to customize their mails.
  • The landing page feature would obviously be one of them. However, it also provides pages besides this.
  • One of them is a squeeze page. The goal of a squeeze page is to lure a client with things such as free eBooks, or podcasts to an extent that the client provides the company his or her email address.
  • Another one is a called a splash page. This provides your visitors the sort of curiosity they get when they see a trailer of a movie. It is sort of advertisement to your main landing page and gives very little information about it to the viewer.
Templates:
Instapage consists of more than a hundred templates to help users get more creative when it comes to designing mails and newsletters. People are more likely to focus on eye-catching emails and product related newsletters rather than the plain-looking ones. Therefore, instapage has eradicated this obstacle by facilitating companies with many options to enhance their creative skills and making their land pages more unique.

Lead Generation:
This marketing tool helps the company to collect as much data as possible about its clients and further identify their personality and provide individual offers to them according to their taste.

How much does this all cost?
Instapage has introduced three packages for registration:
  • Basic: (for $29/m) users can get unlimited pages, visitors, domains, and 2 live A/B split tests
  • Professional: (for $55/m) users can get the same facilities as mentioned above with additional features of template importing and unlimited A/B split tests
  • Premium: (for $79/m) users can get the above mentioned offers as well as phone, chat and email support. They are also provided with custom code editing and webbooks integration.

GETRESPONSE OR INSTAPAGE: HOW ARE THEY SIMILAR AND DIVERESED?
When comparing both marketing tools, they are somewhat similar. Both offer a 30 day free trial to help users in making their final decision to make a real subscription.
Furthermore, GetResponse as well as Instapage provide steps and guides to create landing pages, though Instapage provides a more detailed information on the matter, such as the meaning of landing pages and steps to improve them. Both also give the option of A/B testing, so that the users can compare their newsletters with different decorative elements.
However, GetResponse has a more established reputation as compared to Instapage as it is the easiest marketing tool around the globe with countless organizations joining it. GetResponse offers features slightly different from the rest of the marketing tools and provides additional attributes, such as autoresponders. Furthermore, GetResponse provides a wider range of pricing options, the cheapest one being cheaper than Instapage’s basic package.
Also, Instapage only offers landing pages and on the other hand GetResponse offers Email tool along with landing pages. So you get the complete email marketing stuffs from GetResponse.

How to Run Android games and applications on PC free

Android is by far the best mobile operating system as it comes with a lot of amazing games and applications. Sometimes, we want to play that games on our PC but some of these apps and games which are available at Google Play Market are not available for Windows and Mac operating systems. So, what should one do??
Today, in this tutorial we are going to tell you how you can Run Android games and applications on PC. All you will need is a software which is known as Bluestacks.
Run Android games and applications on PC
Bluestacks in an Android emulator which will help us to Run Android games and applications on PC. You can have the perfect Android experience on your Windows and Mac Operating system using Bluestacks.

How to Install Bluestacks


Step 1: First of all you need to download BluestacksClick here to download Bluestacks for your Windows or Mac Operating systems.
Step 2: Once downloaded, install it using the executable file.  You will see a couple of steps in the installation wizard. Follow these steps and installation will be continued.
Once the installation is done, Bluestacks icon will be available on your desktop.

Run Android games and applications on PC


Once you have downloaded and installed Bluestacks, the next thing you need to do is open Bluestacks and follow the steps mentioned below:-
Step 1: When you will run the Bluestacks for the first time you will be asked to insert your Google Account details. Insert the Google Account details so that, that account can be synced with Google Play market.
Step 2: Once your account is synced you are ready to go. Open the home of Bluestacks by clicking on Bluestacks icon and you will see a search field there. Type and name of app or game there.
Let me explain you this with the help of an example:- In the Search field enter “Whats App” (without quotes).
You will see What’s App on the homepage and will also see an Install Button present there. Click on Install button and the app will start downloading. The download time will take depending on your internet’s speed.

How to Edit a PDF file Easily free

People prefer to create their documents in PDF format such as invoices, letters, presentations and legal forms etc. But many times the pdf documents needed some variations to be done or sometimes they have several mistakes. As it cannot be simply edited in Adobe reader or Adobe viewer where you are viewing it, you need to do something special to edit it according to your requirements.
But unfortunately there is no free desktop tool available to perform this function accurately. Although there are some softwares available which have ability to edit pdf files but all of them are demanding hundreds of dollars and nobody is providing them for free. Still here I am sharing some ways to Edit a PDF file


Below are Some Methods to Edit a PDF file


Method 1 : Using pdf to word convertor

Download any PDF to word convertor software from internet.
It is easily available over there. Convert your pdf document into .doc or .docx format and after conversion open it in Ms office or Open office and here you can edit the text or images in that file. Later when you finish editing you can again convert it into pdf file using Word to pdf convertor.
For downloading pdf to word convertor software you can simply google it. Accuracy of documents after conversion may vary depending on the software you are using and its version.

Method 2 : Converting pdf to word online
If you don’t want to download and try many softwares for conversion , you can simply do it online. CutePDF-Editor  is one websites offering this service of converting documents online. You can always use google for more such website.
cutepdf editor
All you have to do is to upload your pdf file to any conversion website and download its corresponding word file after it gets processed. Once you receive it in word format you can edit it using any word processor software.
Also for converting word file back to pdf format you can reverse the process and do it online. It is a bit time consuming process because it requires an internet connection , uploading and downloading of file but if you don’t need to convert pdf files regularly , it is a good option rather than installing unnecessary softwares for doing this.


Method 3 : Using Non-Free Tools

Finally, if you edit PDF files daily and the above solutions are not sufficient for you there are also plenty of commercial PDF editors. Unfortunately, many of these programs can cost several hundred dollars but they will assure you the unmatchable quality and user friendly interface for editing the documents.

Tuesday, 23 February 2016

Prank your Friends with this Awesome trick free

What if I tell you that there is a spirit who owns a website here on internet and he can answer all your personal questions. Even he knows everything about you and your life and whatever you ask him , he will respond you with exactly correct answer in return.
Of course you won’t believe me. But you can bet about it with your friends and once they see this happening with their own eyes they will be shocked and will start believing in you.
So this is nothing but a simple prank which you can play with your close friends about whom you know a bit.

How to do it ?


Tell your friend that you have a buddy on internet which is a spirit and he knows everything . You can ask him any question and he will answer it.
Now he will ask you to prove it, simply follow the given steps and your friend will be amazed !!
Step 1 : You need a computer connected to the internet.
Step 2 : Open the website – http://www.peteranswers.com/
Step 3 : Here you will see a box with two text input fields on it as shown below.

Step 4 : Before entering anything into these text fields ask your friend that what question he want to know from peter.
Step 5 : Once you know the question, Tell your friend that you have to type in petition a request to peter and this will be : Peter please answer the following question:
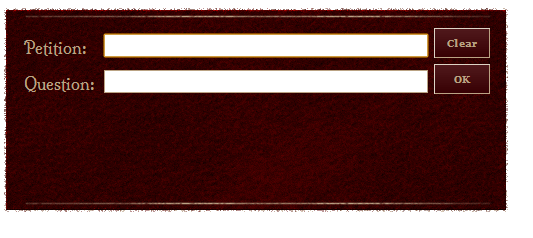
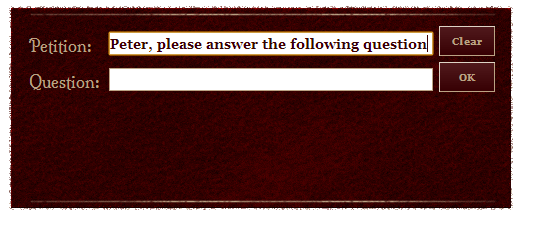
Then you will type question in next field and submit it.
Step 6 : Here the trick is hidden in step 5.  Once you know the question of your friend, if you know the answer simply type it in petition starting with a dot “.” then write the answer and finish it with another dot“.” and in case you don’t know, just type normal petition i.e. Peter please answer the following question: and his question in respective field and click on OK. It will automatically reply something unusual like I am not interested or ask something else etc.
E.g. : You ask a question , what is the name of my website ?
and you want the answer to be SmartTricks then type it in  the petition
” Peter please answer the following question: .SmartTricks. “
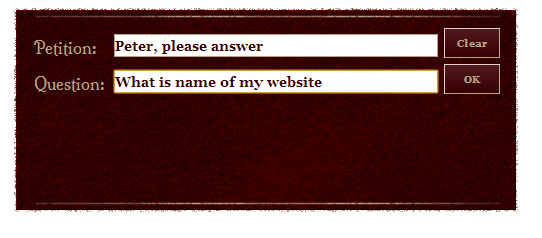
So after entering details when you click on OK , it will show the following result.
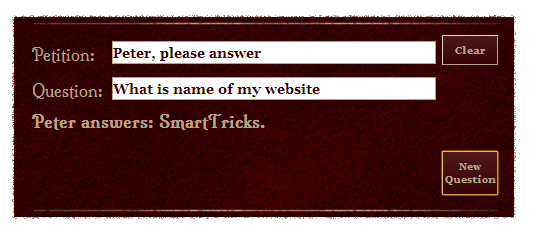
Your friend will never know that you wrote the answer during petition because when you put a dot in petition, after that no matter what you are typing, only Peter please answer the following question: will be displayed on screen.

Tips :

  • Always listen the question before writing petition because this is where you will be writing answer.
  • Don’t let your friend change his question after you write petition.
  • Never let him see keypad while typing petition. Try talking to him and divert his mind somewhere else.
  • Make sure you put dots carefully in starting and ending of answer.
  • If you don’t know the answer simply type normal petition and question, site will reply something to confuse him.
  • Keep suggesting him questions to be asked. Normally like which color I am wearing or where am I , what is name of my best friend etc.
Prank your friends and Enjoy !!!

How to Download torrent files with IDM free

Torrent use is very popular these days. Whether you want to download a large file, or even a small one, you can use a torrent to download your desired file. In order to download the files, you need seeders and leaches. The more seeders, the better because you get faster download speed. The lower the seeders and leaches count, the slower the speed. You can Download Torrent Files With IDM yes you heard it right.
In this tutorial, you will be shown how to Download Torrent Files With IDM. IDM is a very popular download client that helps you download many files at once, but also accelerates the download process. If you especially want to download very large files, IDM can come in very handy because it separates the file(s) into parts and downloads the smaller parts in accelerates rate. Once everything is downloaded, the smaller files are put back together into the original file you intended to download. Fairly simple, right? Now lets move onto how you can Download Torrent Files With IDM .

Steps to Download Torrent Files With IDM


Step 1: Select any Torrent download client such as utorrent or Bittorrent. You can use these clients to download the Torrent files onto your computer.
Step 2: Go to a Torrent uploading site such as ExtraTorrent or zBigz.
In this step, you will be uploading the Torrent you downloaded earlier. Step 3: Upload the Torrent using the sites stated in the previous step, or if you have a site of your choosing, go from there. Make sure to use the “Free” uploading option. Assuming that you don’t want to pay for an account, just go with the free option. Do note that if you go with the free option, there are limitations set by the website. If you go with a premium account, some extra perks are provided.
Depending on how big the Torrent is, that’s how long it may take to upload. It also depends on how fast your Internet connection is. The faster your connection is, the faster the upload speed will be.
Step 4: Once you have uploaded the Torrent, there should be an option for you to “ZIP” the Torrent. Normally, there will be extra options to download the contents of the Torrent file individually, but for now, lets go with the “.zip” option.
Step 5: Once everything has been zipped in the “.zip” format, hit download.  Internet Download Manager  should pop up and automatically take over the download process instead of your browser.
This may seem like a bit tedious process, but it’s well worth knowing that you can download the Torrent through a ZIP file format without having to worry about increasing or decreasing connection speed. More people these days are using this process in order to speed up downloading and uploading of Torrents.
If you liked the tutorial on Download Torrent Files With IDM, please leave a comment below and let us know what you think.

Create Facebook Page without Name-How to Guide free

If you are a Daily facebook user or a facebook addict, you might have come across some Facebook Page without Name . Well at that very moment you must have thought about how did these guys can create it. You might have even googled it , but never succeeded.
Creating Facebook Page without Name is as simple as 1,2,3 . Just be with me and by the end of this tutorial you will be able to Create one by yourself. We will be Using some Arabic characters to Create a Facebook page with no name.

How to Create Facebook Page without Name?


if you have already Created a Page on facebook before than this is going to be the Easiest tutorial for you, For those who don’t have any experience in creating a page , Believe me i will keep it Simple just Follow the Below simple steps.
Step 1: Login to facebook and click on Create page or just click Here .
Step 2: Now Click on Company, Organization or Institution (Not mandatory You can click on any.) and Choose a Category, again you can choose any it doesn’t really matters.
Step 3: Now copy the below characters and paste in the place of name just like shown in below picture and Check the box which says i agree to facebook pages terms.

[sociallocker]
ٌٍٍِّّْ
Facebook page without name[/sociallocker]
Step 4: Now, Click on Get Started, Give a short description and click on “Save info” now you can click on skip, skip and skip .
Step 5:  With this said, We have successfully created a page , But we can see the Characters which we entered earlier, we are making a page without any name or Character. Now in admin panel, click on Edit Page > Edit Settings.
Facebook page without name

Step 6:  Click on “Page info”  , the first thing you will see will be the Name, Click on Edit and use your Backspace key to Delete everything from the box.
Step 7: Click on Save Changes. If you have done all the steps as explained then you must not get any error.
Step 8: Click on View page to check your Facebook Page without Name.
Facebook page without name
Step 9: Upload a profile picture and Cover photo if you want. Now its Time to Show your Page with No name to your Friends. Try it by Yourself While its Still working.
Note: The Code and the Trick to Create Facebook page without name is not working any more, This trick was working fine at the time of Creating the tutorial. There is still one or two pages on whole of fb which has no name.