


In this article, I’m going to share best things about WordPress Admin Toolbar. It’s a simple and short tutorial about seamlessly adding 3 new menu locations inside the WordPress admin toolbar, and remove the built-in WP logo menu. So, I hope you will like this article to make your blog’s admin toolbar as you desire it to be… However, you can add new menus in the existing admin toolbar menus.
Let me elaborate a little bit more about where you can add menus inside WordPress admin toolbar. The first menu location is where the ‘Site Name’menu under the drop-down on the left side. Second menu location is along the main toolbar. Third menu location is under the ‘Howdy / My Account‘ dropdown.
Note: Once you install and activate the plugin ‘Admin Toolbar Menus‘ in your blog it easily remove the built-in WordPress logo from the toolbar once you activated it.
How Admin Toolbar Menus Plugin Works?
It’s a super simple to use, just like building any other menu in WordPress using the menus page. Follow the steps below:
- First of all, create your menus for all three locations as I described above in the very second paragraph

Create a New Menu in WordPress 01

Create a New Menu in WordPress 02

Adding Links to Menu in WordPress
- Now, navigate to Appearance → Menus → Manage Locations
- Here you can easily performance the action about where you want to add menus in the admin toolbar i.e, Under Site Name, right inside toolbar, or under the Howdy/My Account

Manage Locations of Admin Toolbar Menus
Whoa, we have just reached to the conclusion of this tutorial with an additional Link of WordPress category under the Side Name Admin toolbar menu. See the final result here:
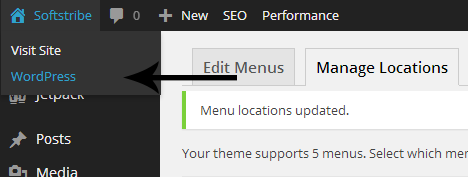
Menu have been added under site name
0 comments:
Post a Comment